Handholds are an easy and inexpensive way to increase your security afloat
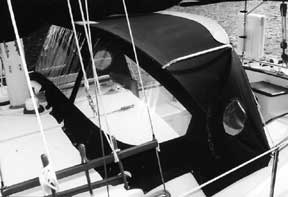
Dodgers are not necessary – that is, if you’re a masochist or a Spartan who enjoys being hit in the face with water from every wave when beating to windward or developing windchill in the off-seasons. Since I’m neither a Spartan nor masochist, I wouldn’t do without my dodger. I find it an indispensable accessory for creature comfort. It provides protection from the spray, wind, rain, and sun and prevents downpours from entering the cabin when the companionway hatch is open.
For all of the obvious advantages of a dodger there is one glaring, and potentially dangerous, disadvantage. If you have to go forward when the seas are kicking up and the deck is bucking like a bronco, the trip around the dodger becomes hazardous. There are no handholds except for the low lifelines; you can’t clip your safety harness onto the safety line until you’ve made it around the dodger; and the shrouds are usually too far forward to be of any use. For any member of the “over-the-hill gang’ like myself, especially when sailing solo, the risk and insecure feeling is compounded.
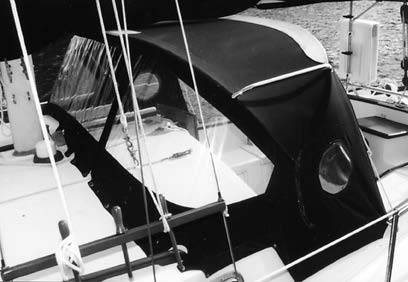
The obvious answer is to have a handhold available. I recently installed handholds on our dodger, and it has increased our sense of security dramatically.
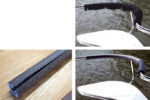
The stainless steel tubular frame that is an integral part of dodgers provides the mounting spot. I used streamlined stainless steel handles manufactured by AFI Industries. They’re made from bent stainless steel tubing with 2-inch-long by 1/4-inch threaded studs at each end. These handles are widely available in 12-inch, 18-inch and 24-inch lengths from West Marine, BoatU.S., and many other catalog and retail marine-supply stores.
The first decision is to determine what length handles suit your installation. Try a simulated trip around the dodger to find the best height for a handhold, then at that spot measure the distance between the two diverging frame members. The figure closest to one of the three sizes is the one you want. Remember that by just moving the handle a few inches up or down, a fit can be obtained.
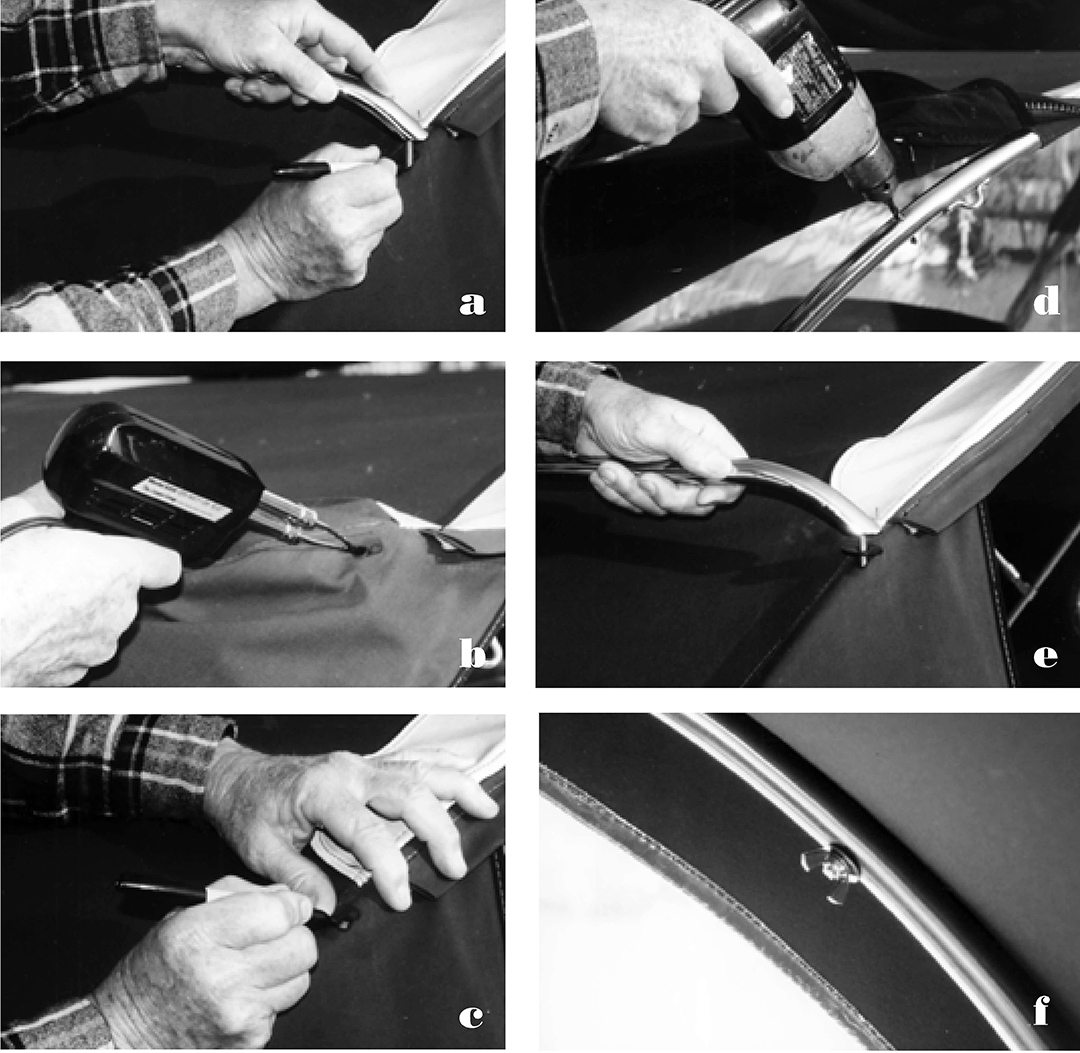
After purchasing the length closest to your needs, place the handle on the Sunbrella fabric and slide it up or down until the 1/4-inch mounting studs are directly over the centers of the stainless steel tubing beneath the fabric. Check this position with a level, or have someone away from the boat look at the position of the handle to see if it is at an aesthetically pleasing angle, then mark where the threaded studs touch the fabric.
Now loosen the dodger fabric so it is away from the frame. Most of the fabrics used for dodgers are made of acrylic material, such as Sunbrella. The hole for the threaded studs of the handle can be made through these synthetic fabrics with a hot soldering iron, a heated screwdriver, or even a heated nail. The hot tool melts its way through the acrylic fabric with surprising and disconcerting ease, like the proverbial hot knife through butter. As the hole for the stud is made, the fabric ends are simultaneously sealed to prevent unraveling, in the same way the end of a nylon or Dacron line is sealed with a hot iron or flame.
Now replace the dodger cover and tension it to its normal position. This is important, since the stainless steel tubing will be held in this final position by the handles. Mark the stainless steel tubing through the holes you have made in the fabric. Pull back the dodger cover and drill 1/4-inch holes in the dodger’s tubular frame at these marks.
The cover now goes back on again, and the handhold studs are put through the fabric and frame. The 2-inch-long studs on the handle will probably protrude too far on the inside, and you may want to cut them off to make them shorter. As always, when cutting a threaded bolt, put a nut on before cutting. After cutting, removing these nuts helps to clean out the thread where the cut has been made.
Two rubber gaskets come with each handhold. When installing the handle, these should be between the handle and the fabric, cushioning the contact as well as making the hole watertight. Although 1/4-inch stainless steel washers and nuts also come with the handles, you might want to consider using stainless steel wing-nuts on the inside rather than the nuts supplied. This makes disassembling the dodger simpler and faster, with no tools required. These wing-nuts are available at nearly every marine-supply store.
Now do the same for the other side of the dodger, and your job is completed. The whole project shouldn’t take more than an hour or two.
The first time I used my new handles in a seaway I wondered why I hadn’t done this long before; they solve the problem perfectly. And I discovered that as an added benefit, the handles stiffen up the whole dodger frame remarkably. Installing handholds on your dodger is an upgrade and safety project that is well worth the small time and expense required – and may pay off in unknown dividends sometime in the future.
Article originally appeared in Good Old Boat magazine: Volume 4, Number 2, March/April 2001.