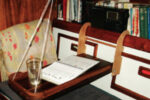
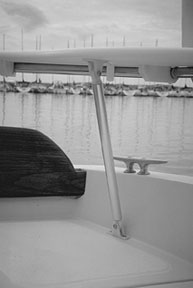
Common on many newer stock boats, pushpit or stern pulpit seating is a great addition to any good old boat as well. The pushpit is the stainless steel framework aft of the cockpit. It’s an important safety feature on any cruiser and, therefore, generally well constructed. This makes it a perfect location for the addition of seating areas that are not only great sailing thrones, but also provide out-of-the-action perches for non-sailors as well.
This is a reasonably simple project. Materials are readily available and fabrication is easily accomplished using tools found in most household workshops. These instructions will loosely guide you toward results similar to what you see in the photos, but every boat is as different as its owners’ personal tastes.
It is essential that your pushpit frame have a center horizontal rail. You really can’t consider the project without it. It supports the seats and gives you something to fasten them to. You’ll need some stiff corrugated cardboard for patterns. The sides of a cereal or tissue carton will do. Most frames will have one or two vertical supports near the bends in the corners. In our situation, these supports neatly defined the location of the seats. Your frame may be different. Lay the cardboard on the corner of the center rail. Doing so may require you to notch around a support or two. This is a trial-and-error challenge and may take a bit of time. Also make sure the pattern covers the entire area being considered for the seat. Then simply trace the outside contour of the rail onto the pattern. Also mark where you want the seats to end up on the frame. Don’t make the mistake of assuming that both sides of the frame are the same. Port and starboard seldom mirror each other, and you will need to make a pattern for each.
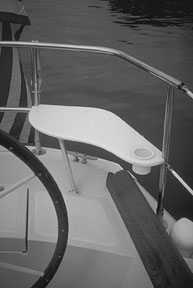
With the outline of your frame in hand, lay out the seats. Keep in mind that what you are doing will have some impact on the appearance of your boat. Your seats should be well proportioned in respect to the rest of the cockpit. Older cruiser/racers often have narrow transoms, so keep the seats fairly small – just enough to give support, with enough room left over for a beverage holder, if you want one. Another tip: there are very few truly straight lines on a boat. Use smooth flowing curves when laying out the inboard edge. Your final design should be pleasing to the eye and look like it belongs on the boat. Set both patterns on the frame to satisfy your eye before plugging in the saw. Then label them port/top and starboard/top.
We used 3/4 inch polyethylene stock for our seats because it was readily available. This may not be the case in your area. A better choice would be Starboard, a material made specifically for marine environments. Starboard comes in several sizes and colors. It can be ordered from most mail-order distributors. (I got mine from Elastomer Engineering Inc., 801 Steuben St., Sioux City, IA 51102. Phone: 712-252-1067.) Be sure to use material thick enough to give good support. I recommend 3/4 inch.
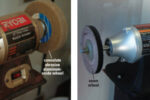
Transfer the patterns onto the material and simply cut them out with whatever you have on hand. A band saw is best, but a handheld sabre saw will do nearly as well. Take your time and try to cut right to the outside edge of the line. The holes for the beverage holders are best made with an adjustable circle-cutting bit mounted in a drill press, but the sabre saw will work here as well. Whatever tools you use, you are going to end up with edges that need some additional work.
Sand or file them smooth and fair. After they match the pattern and look good to the eye, you can contour them for comfort. This is easily done with a router, and if you don’t have one, a friend probably will. All that is necessary is to round over the top. But we chose to bullnose ours. The router should leave you with a nearly finished edge. Use a Scotch-brite pad to do any final smoothing.
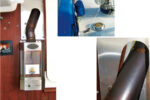
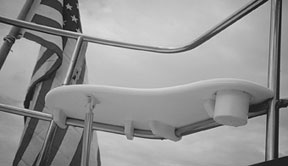
With the seats shaped and edges smoothed, it’s time to mount them on the frame. Ours are held in place with custom clamps made from the same material as the seats. But making similar clamps would be difficult without a drill press. Stainless steel straps are an easier and better choice. Whatever you use, they should be through-bolted like hardware subject to stress. Countersink the heads and plug the holes just as you would if doing traditional woodwork. The beverage holders are held in place with marine-grade silicone.
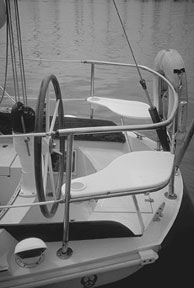
Unless your seats are very small, they will probably require additional support. Our Ericson 32 has a split cockpit with an athwartships bench behind the helm. This made it easy to extend struts down to the original seat level. Most conventional cockpit arrangements should work. The struts are short sections of stainless or aluminum tubing with the same kinds of ends and mounting brackets used in Bimini frames. These items can be found in any boating area and also ordered from marine catalogs. Position the struts for good support. Ours run from near the center of the inboard edge, down to the back of the original cockpit seat. This retains some useful space on the bench below.
Our seats have endured two Midwest sailing seasons and we immediately found them to be one of the best improvements we’ve made on our good old boat.
Article from Good Old Boat magazine, November/December 1999.